Lizzie D. Wysong
  • Home
  • Vittles
  • Jotted
  • Gallery
  • Munerarius
  • Contact

Buche de Noel 

12/29/2014

0 Comments

 
Buche de Noel
My projects almost always start on a whim. Ambitious whims, more often than not, fueled by pride and an unwavering belief in success. This year's holiday whim was to make a buche de noel. I had never made a buche de noel before, nor had I ever attempted meringue mushrooms, and the one time I previously tried a roll-up cake, it didn't go so well. But none of that deterred me, for I was determined to make the most excellent buche de noel anyone had ever seen. 

And you know what? I did. 

Despite some frustrating hiccups during the preparation and assembly, the overall result was stunning, if I may say so myself. (Because I am, and will continue to do so. I was, and am, immensely pleased for having done this.) 
Buche de Noel
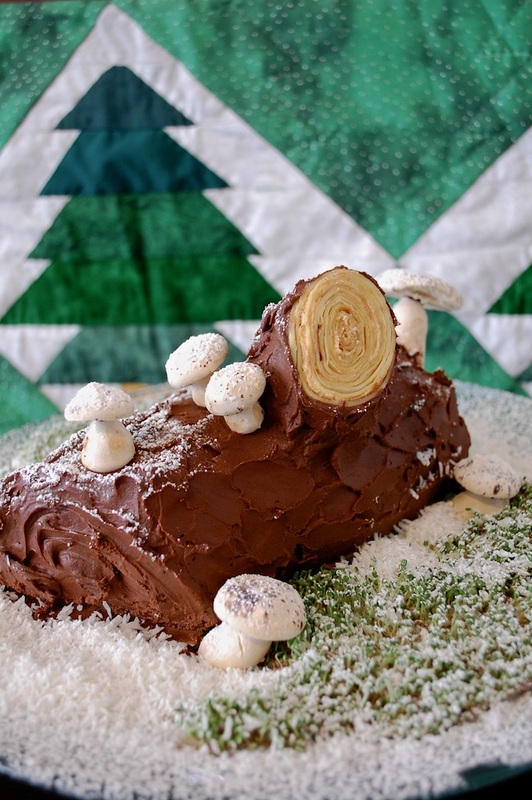
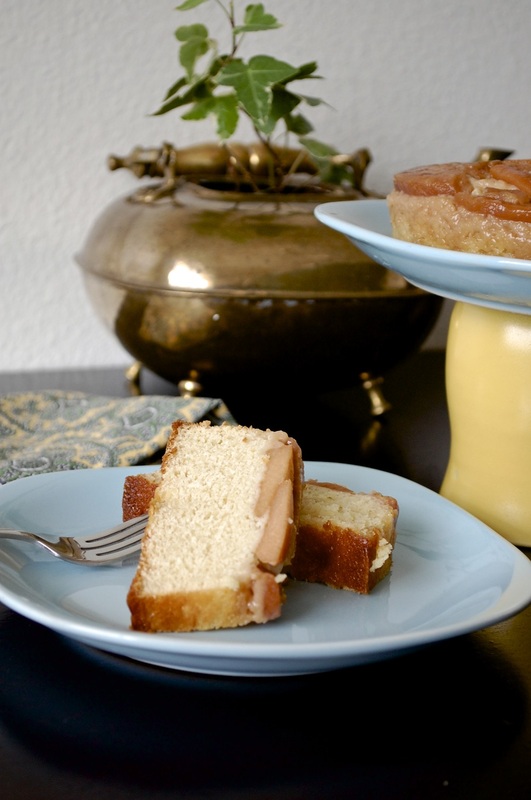
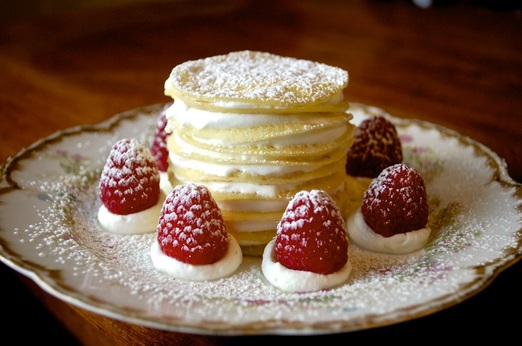
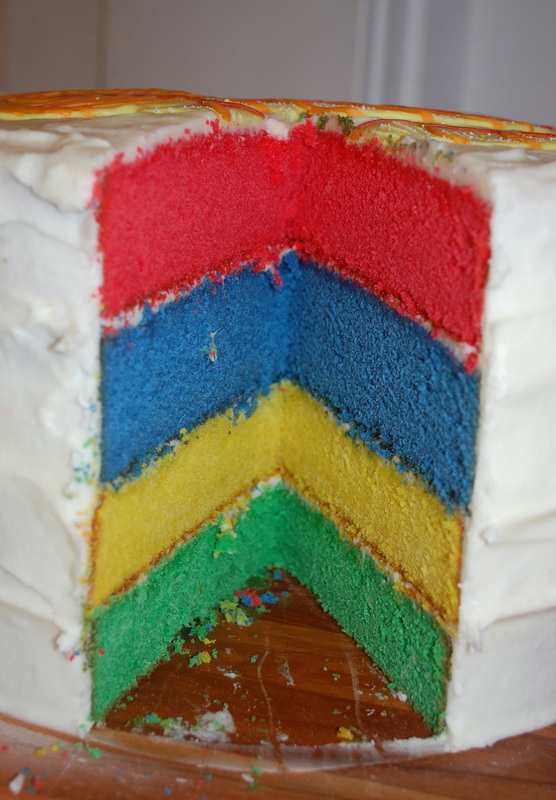
But of course, me being me means that this was no ordinary buche de noel. While the traditional ones are an actual roll of sponge cake around a ganache or frosting center, I decided to make mine out of layer upon layer of crepes. Why? you ask. Because does one spiral a tree-limb make? No. Absolutely not. Trees have rings! Lots and lots and lots of rings. And the best way to achieve this faux-ring look? Lots and lots of thin layers. Hence, crepes. It was a stroke of genius, and one full heartedly supported by my husband, who does not like cake. 
Crepe Log
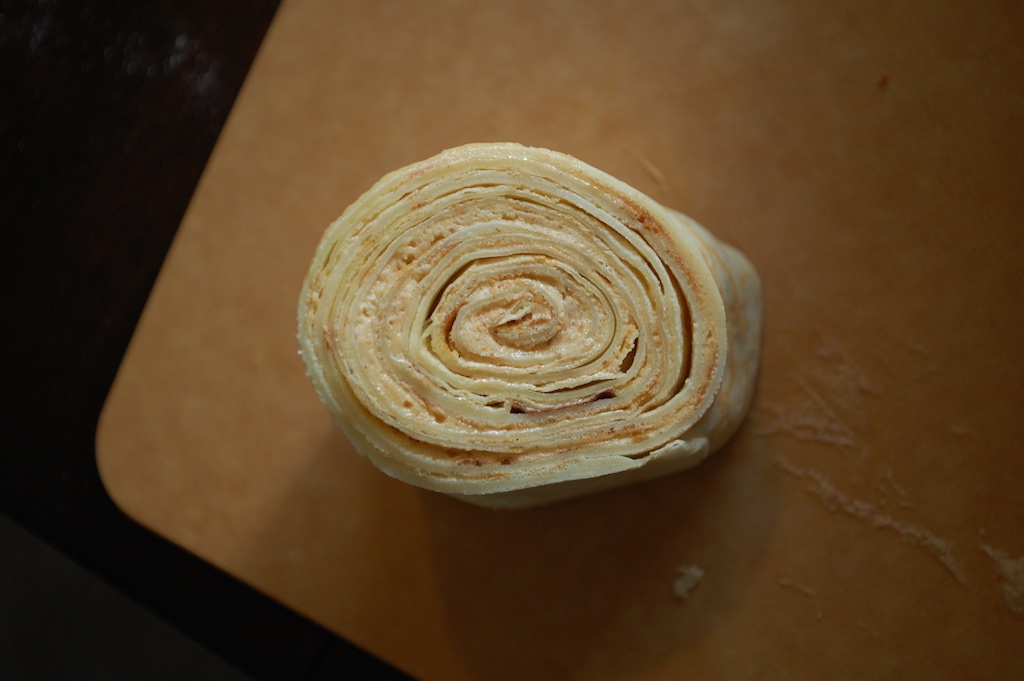
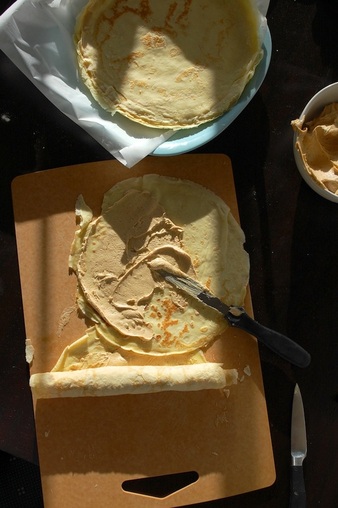
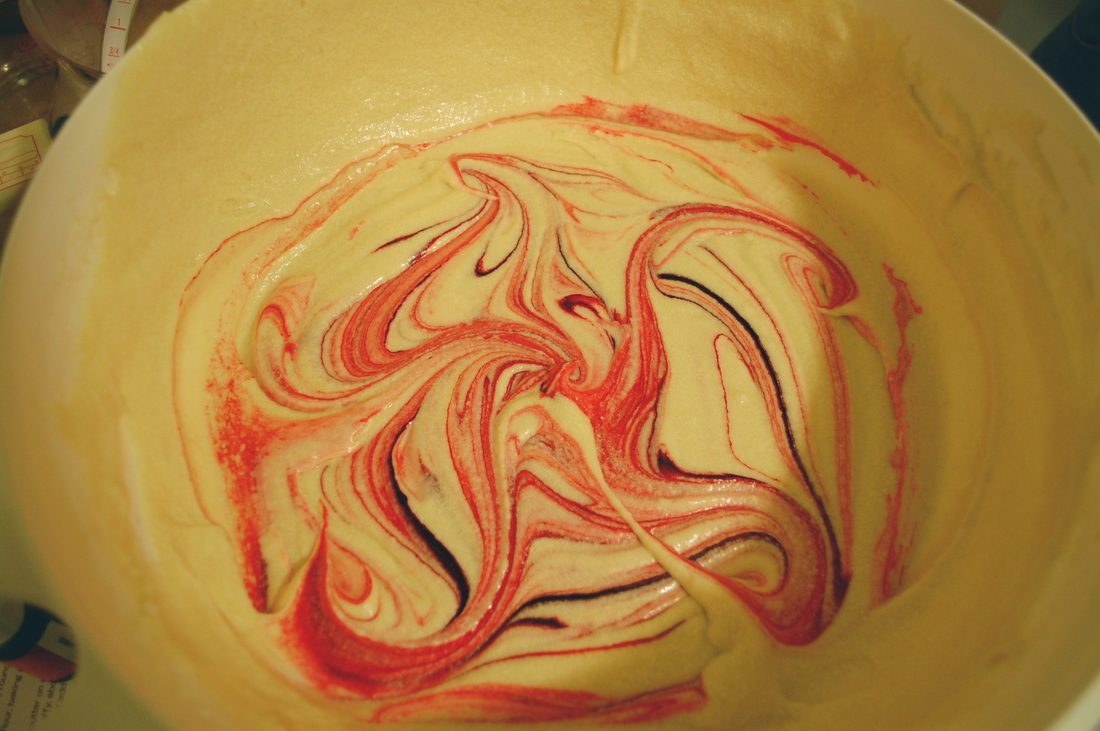
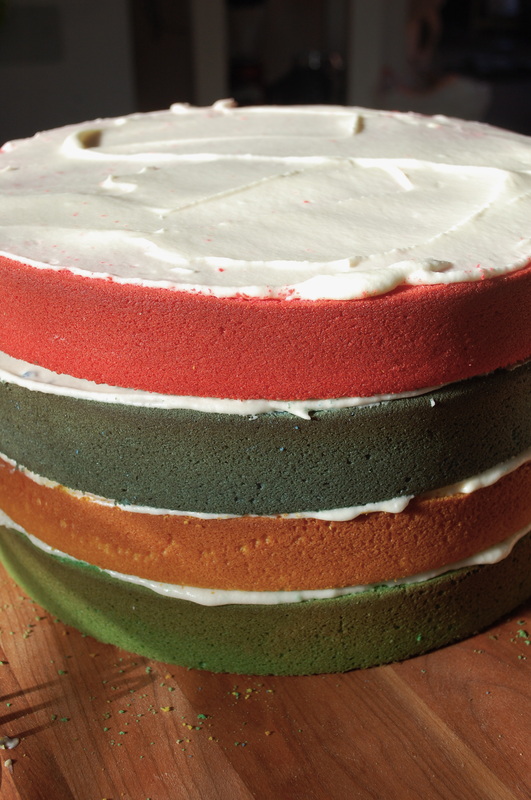
Well since the rings themselves were so important to me, so were the colors. I did a traditional crepe batter, unflavored, and in between them spread a peanut butter filling that I made by mixing peanut butter with butter and powdered sugar. I then rolled the crepes on top of one another, overlapping each a little to keep them from slipping. I then trimmed it and let it rest in the fridge so it would hold its shape. 
Crepe Log Assembly
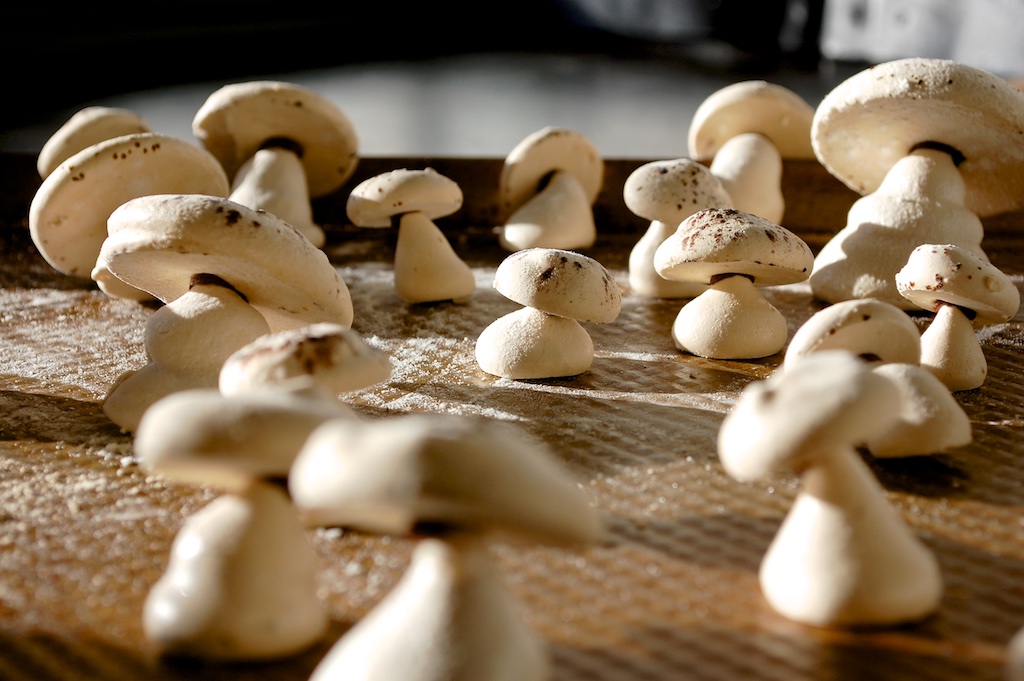
The other components of this cake were little meringue mushrooms and a bed of sprouted chia seed grass. Yes, you read that right. Sprouted chia seed grass. I made an actual forest floor for my log to rest on. Chia seeds are immensely easy to sprout, and although mine did not quite open as much as I thought they would, it still worked. 

The mushrooms did end up looking how I imagined, but they were by far the most troublesome pieces of this whole adventure. I live in Washington, where it is nearly always damp, which is the enemy of good meringues. They constantly fell apart, or started going gooey, and the tops kept sliding off the bottoms, despite the little ganache glue I used to keep them together. But honestly, they looked nice for the pictures, and that was all that mattered. 
Mushroom Meringue
Mushroom and Chia Grass
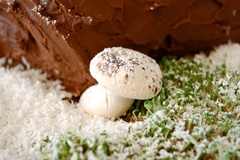
The frosting was a simple chocolate ganache, spread unevenly like a rough bark. The branch and the mushrooms were attached with a little more ganache, and some finely shredded unsweetened coconut made a nice bed of snow, followed by a dusting of powdered sugar. 

It was a perfect Christmas dessert, and we enjoyed it in front of a roaring fire with glasses of champagne. When I asked Reid if he would rather have had real cake, he said no, and that he would choose crepes over cake every time. 

So here is to a project I can be proud of, one I wasn't sure I could pull off, but did. And here is to already thinking about next year's. Cheers! 
Buche de Noel
And Merry Christmas/Holidays to all! I hope this season has treated you well and I look forward to moving into the New Year with you. 
0 Comments

Rum Poached Quince Cake

6/24/2014

0 Comments

 
I've had a lot of two things recently: time on my hands and new bakeware to use! The perks of being recently married and not-yet-employed. 

My first project since moving into my new apartment is a rum-poached quince upside-down cake. I found the quince at our local Safeway, which was a huge surprise for me. I hardly ever see quince commercially sold anywhere, and definitely not at the start of summer. Quince is normally a winter fruit and has a tangy flavor that is really complemented by the warm flavors one normally associates with the season. But I had to have them anyway, and I knew it would be a fun challenge to turn this winter fruit into a summer sensation. 
Rum Poached Quince Upside-Down Cake
I've read that some people would describe them as tasting like a cross between a pear and pineapple. This doesn't quite ring true to me, as pineapple flavor is so unique, but the pear bit is correct. I would describe it more like a sour pear, with citrus undertones. However, the pineapple description gave me an idea. What brings out the tropical in something more than rum?? 

It was decided. I would poach the quince in some spiced rum and then make a very subtle lime-cake to accompany them. Raw quince are basically impossible to eat, so you must cook them in order to make them edible. I used Kraken Spiced Rum because I don't actually like any other kind. Since the rum was already spiced, I didn't add anything else to the poaching liquid besides some raw sugar and water. It takes a long time to poach quince, so if you have a lot of them in your pan, expect it to take a few hours. I had two and it took 30-45 minutes. When you can pierce through the flesh easily, with no resistance, they are done. Thankfully, quince are also quite forgiving, so if you forget about them they won't immediately turn to mush on you either. 
Rum Poached Quince Upside-Down Cake
I modified a recipe for upside-down pear cake for the cake base, leaving out the spices and instead substituting in some lime zest and a little lime juice. This was to help keep the flavors bright instead of cloying, and to blend well with the rum and quince. Overall the dessert was absolutely delicious and perfect for a sunny summer day. It would be decadent served alongside some coconut whipped cream and a Vietnamese iced coffee, or given a healthy drizzle of fresh raspberry purée. 
Rum Poached Quince Upside-Down Cake
Wow- look: a recipe! Or part of one, anyway. For poaching quince I would recommend looking up a good recipe (this is my go-to) and then adapting for the amount of quince you have on hand. My rule of thumb is to taste the poaching liquid for the right flavour compound, and then just make sure it covers all the fruit for the duration of the poaching. 

Cake recipe is derived from Dessert of the Day by Kim Laidlaw. 

For the pan bottom:
5 Tbsp butter
2/3 cup packed light brown sugar
2 Tbsp of reserved poaching liquid


For the cake:
1.5 cups all-purpose flour
2 tsp baking powder
3/4 granulated sugar
1 tsp kosher salt
3/4 unsalted butter
3/4 cup whole milk
2 tsp vanilla extract
2 large eggs
1 Tbsp lime zest
1 Tbsp lime juice


Preheat oven to 350*. Butter a 9-in round cake pan. 

Beat together the ingredients for the bottom of the pan. Pour into the greased pan and then evenly arrange your quince on top. I am always partial to the nice spiral design, but that's just me. 

In a separate bowl, combine and sift together the dry ingredients. Set aside. In a mixer, beat together the butter and sugar until light and fluffy. Beat in the eggs one at a time. With the mixer on low speed, add the dry ingredients and remaining wet ingredients in alternating batches, ending with the dry. 

Pour batter on top of quince and bake until the center is fully cooked. Remove from pan right away by inverting it onto a serving tray or plate. Let rest for at least 30 min before serving. 

Enjoy! 
0 Comments

Petits Fours

3/10/2013

1 Comment

 
Hello there everyone! Long time no contact. I've been a little busy with some new things in my life and haven't been spending much time at home in the kitchen. Last night I went on a food documentary binge and was reminded that I have been neglecting my creative culinary hobby. So here you go- a new post about an old project. Compromise. 

Yesterday it snowed and today it is sunny and Thursday it is supposed to be in the 60s. So I guess that means spring is on its way and I couldn't be happier. I'm ready for a little bit of temperate weather and for verdancy to return to the land. My Mom has gotten out her Easter decorations and soon there will be fresh, green vegetables all over the supermarket. It's almost time to pack away those stick-to-your-ribs recipes. 

One dessert that seems to fit perfectly with the spring season is petits fours; a delicate cake usually frosted in (annoying) pastels and topped with an (equally annoying) iced flower. (If you don't believe me just google it.) For those of you who don't know me very well, I despise pastels. I will not wear clothes in pastels and I will not buy anything in pastel colours. Easter merchandise is basically like Kryptonite to me. But I love petits fours. I always have. They are the perfect tea party food: small, impressive, and usually found in a variety of flavours. 

Which is why Lis and I made them for our tea party. Except we left out the pastels. 
petite four molds
petite fours drying
This is another one of those recipes where Lis pretty much did all the real work and I just photographed her efforts. The batter was a light sponge cake poured into mini molds specifically made for petits fours. The molds come in fun little shapes - a nice change from the standard square. 

We had decided to split the petits fours into four different types. After the cakes cooled we cut each one in half and then soaked them in different liquids. There was a lemon simple syrup, a lavender simple syrup, maple syrup-whiskey, and coffee-whiskey. The next step once the cakes dried a bit was filling them. The maple-whiskey ones were filled with caramel; the coffee-whiskey with nutella, and the lemon and lavender ones we filled half with lemon curd and half with a whipped cream. 
caramel-maple-whiskey
After filling the petits fours get iced. The maple-whiskey and coffee-whiskey ones were covered in a chocolate ganache and the lemon and lavender ones were iced with a white-chocolate ganache. Then in place of the traditional little icing flower we topped each petits four with either a bit of lemon zest, lavender, candied ginger, or coffee bean. 

They weren't lofty little cubes. They weren't perfectly iced in smooth, pastel colours. But they were absolutely delicious and exactly what a tea cake should be- light, interesting, delicate, and not so sweet that you can't eat more than one. 

So if you are throwing a "welcome home, spring" party or even hosting an Easter brunch, be sure to include some petits fours. Trust me- it'll be a nice detour from carrot cake. 
petits fours
1 Comment

Mini Crepe Cakes

10/14/2012

0 Comments

 
Mini Crepe Cakes
My mom has been doing this fun thing lately where every Sunday she brings me a secret ingredient. Last week's ingredient was Creme Fraiche. I didn't really know what to do with it, as it is not something I come across often. And, to be honest, the first thing that comes to my head when I want to pair creme fraiche is salmon, an no one in my house eats that. But I did a little perusing around the internet and came across a crepe cake and decided that instead of a mousse filling I would use a whipped cream and creme fraiche filling. 

I used this recipe for the crepes, except I added a little lemon zest just to heighten the flavour. The recipe also calls for a 6 inch pan, which we didn't have.  I tried to use a 10 inch nonstick pan, but that didn't work quite so well. 10 inches is just slightly too big of a crepe to be able to flip easily. And of course we didn't have a nonstick 8 inch pan either. So in the end I just poured small batches in the 10 inch and didn't worry about whether or not they were a proper circle. 

***Here is a tip for making crepes: the first few will never turn out well. They won't, unless you're a magician or just overly talented. The best thing you can do is be patient with your pan. Give it time to heat up. Don't rush it and don't rush the flipping of your crepes either. You want them to have a little colour. 

When all my batter was gone I had a pretty good stack of wonky crepes. I used a 2 inch biscuit cutter to make small circles and then set them aside to cool. Next I stirred some lemon juice and lemon zest into the creme fraiche. It's ok if the creme fraiche loosens up quite a bit, because you stir it into a stiff whipped cream. I didn't sweeten my whipped cream at all because I wanted the creme fraiche to really stand out and the sugar would've masked it. 

When I was ready to plate I put a dab of the whipped cream mixture on the plate first, then placed the first circle of crepe on top. This is to help it stick to the plate and not slide around while you stack the rest. Put another layer of your whipped cream on the crepe, smoothing it out a bit but keeping a little bit of volume. Add another circle of crepe then more whipped cream and repeat until you run out of crepes. (I was making 3 little cakes, and I think each one ended up with 9 layers.) 

To finish the presentation I piped a little of the whipped cream around the stack and stuck a raspberry on each little mound. What I really wanted to do was brulee the top of the stack, but unfortunately I don't own a kitchen torch. So instead I just sprinkled some powdered sugar over everything. That little bit of sugar was just enough to balace the lemony tang of the whipped cream and creme fraiche mixture. If you own your own torch and feel inspired to make this, try bruleeing the top with some raw sugar and let me know how it goes. 

I made this a few hours before I served it and just kept it in the fridge, which kept the cream from falling. Sugar right before serving. This dessert is wonderful with strong tea or an after-dinner coffee. 
0 Comments

The Best Boozy Bundt

9/2/2012

1 Comment

 
~part two of the ongoing alcoholic infusions saga~
Chocolate
I've been thinking about what I should do with my coffee bean infused whiskey and the only thing I kept coming up with was 'dessert.' And rightly so, I think. But there are so many applications that this flavour combo would work for I just couldn't bring myself to pick and actually make one. 

Until yesterday. My Mom and Gene have left me home alone for the long weekend and instead of throwing a raging party that destroys the house, I went on a baking bender and ended up only destroying the kitchen. I made sugar cookie dough for a project that will be forthcoming but I still wasn't satisfied, so I did the cooking equivalent of throwing a dart and landed on this recipe from Orangette for a whiskey and chocolate bundt cake. It was the perfect PERFECT recipe to use with my coffee whiskey. I even had all the ingredients handy, which was a nice surprise. 
WhiskeySpooning
Let me tell you, the smell of this cake baking was maddening. You know what else is maddening? The fact that although ovens always have lights and tiny little windows to look through, they are almost always worthless. Seriously, who can actually tell how their food is doing through them? I need to be able to see otherwise I will open the door a million times to check on it, completely ruining the purpose of having a door in the first place. 

I managed to wait it out though, and it was worth it. This cake is amazing. It will make your whole house smell absolutely divine and it tastes sinfully delicious. The flavour of the coffee whiskey really comes through and it's not too bittersweet. Definitely, definitely try this cake out, even if all you have is the regular old uninfused stuff. The next time I make this (because I am sure there will be a next time) I am going to make some Bailey's whipped cream to accompany it. 
BoozyBundt
Seriously. Go make this right now. You won't regret it, I promise. 
1 Comment

Big Cake- HP Style

2/7/2012

0 Comments

 
One of the greatest things for my kitchen but worst for my bank account is the sale section at work. While the sale is going on I almost always end up buying something every week. A few weeks ago a cake pan went on sale that I just had to have. It was crazy; this pan was 12 inches in diameter. What would I ever need a 12in pan for? Do you know how big of a cake that is? It's ridiculous. But it was on sale, so I had to have it. Lis and I decided that the best way to christen the cake pan would be to use it for our upcoming Harry Potter marathon. Oh yes, marathon. We watched all 8 movies IN A ROW. It took from 6:30 in the morning to 2 am the following morning. But it was totally worth it and now I can say I've done it and never do it again. Anyway, back to cake...
Picture
This picture is to just give you all an idea of just how much goes into a large cake. (Seriously, how do bakeries source this stuff?) For two layers of cake we needed 10 eggs, 5 cups of sugar, 10 cups of flour, 5 cups of milk and 5 sticks of butter. Our cake was four layers in the end, so you do the math. 
Picture
Having fun with the food colouring.
Picture
It took us about 6 hours to make all the layers. Each one represents one of the Hogwarts houses. And since it was such an enormous cake and the icing alone contributed upwards of 9 cups of powdered sugar, we didn't think it needed much more decoration. But it did need something, so I set to work. 
Picture
Picture
I used modeling chocolate to make the snitch and the letters. It's really easy to work with, tastes better than fondant and is pretty sturdy. 
Picture
And here's the final product! I used food gels instead of normal food colouring because you can get a much truer and more nuanced colour. They cost more but are totally worth it. And now you can see why we chose to do a white frosting instead of chocolate. The white just sets off the layers so nicely. 

We waited to cut into it until the last movie. Even one thin slice was overkill at that point and I don't think any of us finished our pieces. And since the cake was so big I still have about half of it sitting in our kitchen waiting for someone to come along and devour it. I'm very proud of the way it turned out and hope that if anyone wants to show off at their next movie  marathon they will consider doing the same. 

Cheers!
0 Comments

A Very Unmerry Birthday

7/7/2011

0 Comments

 
I would characterize myself as an Anglophile. No, I cannot list the names of all the royalty and, surprisingly, I did not watch the recent nuptials between Kate and William. But I love the United Kingdom and want nothing more than to move back there. 

So no doubt you will see why a holiday like the 4th of July would be distressing for someone who so desperately wants to be an expatriate. If we were still British I wouldn't have to move anywhere! So instead of celebrating the holiday my Anglophile roomie and I held a sort of wake instead, so we could mourn the passing of our mother land. 

Now, no doubt someone will get on my case about how come I didn't make an overly British meal for this occasion and I will tell you now it's because it is the sentiment behind the action that matters, not the action itself. That being said, I will move on to the important things- the food. 
Basil stuffed pepper
I wanted to use my new grill and since the weather decided to cooperate with us everything went according to plan. Bamboo skewers were soaked while I was at work, being unpatriotic in an outfit that didn't even remotely hint at the old red, white and blue. I managed to light the charcoal somewhat quicker than the last time, still without using lighter fluid, but it takes a while nonetheless so as the briquettes sat and smoldered we made kabobs. First we stuffed basil leaves into mini peppers (a trick I would now highly recommend and then encourage you to try with other herbs as well). Then we strung up our other veggies: mushrooms, onions, garlic, potatoes and tomatillos. 
Kabobs
Oh man, were they good. The garlic pieces were sheer genius (my roomie's idea) but my favourite was definitely the onion. Once they were sufficiently browned we salted them and added a bit of hot sauce. I like marinades but sometimes it is better to let the grill do most of the flavouring. 
Picture
Retro-fabulous plate for a perfectly colour-schemed photo.
For dessert my roomie, Lis, made Sad Lemon Cake, which she named after our feelings towards the holiday. There was nothing sad about the actual cake, however, which paired perfectly with rum laced whipped cream. If you are still using canned whipped cream, shame on you. 

So a very unmerry birthday to you, America, and long live the Queen! 
0 Comments

    Archives

    March 2015
    February 2015
    January 2015
    December 2014
    November 2014
    August 2014
    June 2014
    August 2013
    July 2013
    March 2013
    December 2012
    November 2012
    October 2012
    September 2012
    August 2012
    July 2012
    March 2012
    February 2012
    January 2012
    September 2011
    August 2011
    July 2011
    June 2011
    April 2011
    March 2011
    February 2011
    January 2011
    November 2010
    October 2010
    September 2010
    July 2010
    June 2010

    Categories

    All
    Antipasto
    Apple
    Beer
    Blood Orange
    Blueberries
    Bread
    Buche De Noel
    Cake
    Candied
    Carrot
    Cheese
    Chia Seeds
    Chicken
    Chocolate
    Christmas
    Clay
    Coconut
    Coffee
    Comfort
    Cookie Dough
    Cookies
    Crepe
    Crumpets
    Curry
    Decorating
    Easy
    Fall
    Farmer's Market
    Fava Beans
    French Onion Soup
    Fries
    Grapefruit
    Grill
    Guacamole
    Habanero
    Harry Potter
    Hummus
    Ice Cream
    Jam
    Kabobs
    Lavender
    Lemon
    Matcha
    Meringue
    Molasses
    Muffins
    Mushrooms
    Nutella
    Onion
    Pear
    Peel
    Pie
    Pluot
    Popcorn
    Potato
    Pumpkin
    Quince
    Raspberries
    Raspberry
    Rolls
    Royal Icing
    Rum
    Salsa
    Scones
    Shortbread
    Sorbet
    Soup
    Spelt
    Stir-fry
    Sugar
    Tart
    Thanksgiving
    Turkey
    Upside Down
    Vegan
    Williams Sonoma
    Williams-Sonoma
    Wok
    Yogurt

    RSS Feed

Powered by Create your own unique website with customizable templates.